Heading out the door? Read this article on the new Outside+ app available now on iOS devices for members! Download the app.
The internal awareness that develops through yoga is the most important tool for learning to release the psoas. And releasing the psoas will bring new freedom, ease, and structural integrity to your yoga practice.
It can be difficult at first to access the subtle sensations of the psoas. Buried in the body, engaged in habitual patterns of holding (especially when you’re sitting or standing), and deeply linked to your emotions, the psoas is best approached with quiet attention, patience, and perseverance. Awareness is the first key. Like a flashlight that illuminates the contents of a dark closet, you can use your attention to clarify and define each sensation in your core.
See also: What You Need to Know About Your Psoas
Yoga Poses to Help Release Your Psoas
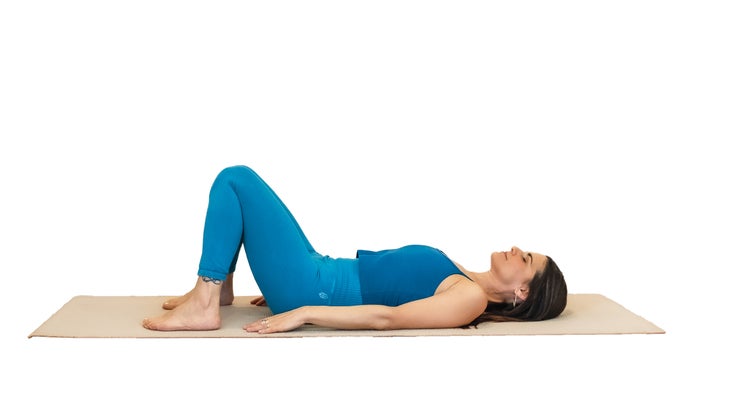
Constructive Rest Position
Rather than trying to instantly correct all the imbalances and habitual compensations you’ve developed throughout your life, we’ll begin by simply releasing the psoas in a posture called constructive rest position. In this pose, you don’t need to perform any muscular action to release the psoas. Gravity will do the work.
To take constructive rest position, lie on your back, bend your knees to about 90 degrees, and place your feet on the floor in line with your hip sockets, 12 to 16 inches from your buttocks. Be careful not to flatten or exaggerate the curves in either your lumbar (lower back) or cervical (neck) spine. Rest your hands and forearms on your rib cage, on your pelvis, or by bringing them to the floor as in Savasana.
Now that you’re in position, shift your awareness to the support of your bones. Begin by sensing the weight of your bones sinking down toward the floor. Take note of any part of your skeleton that feels as though it is suspended, any place where the muscular contraction prevents the bones from surrendering to the pull of gravity. As your psoas continues to release, the distribution of weight will start to feel increasingly even throughout your body.
Try Ajna Yoga Bolster Pillow for Meditation and Support
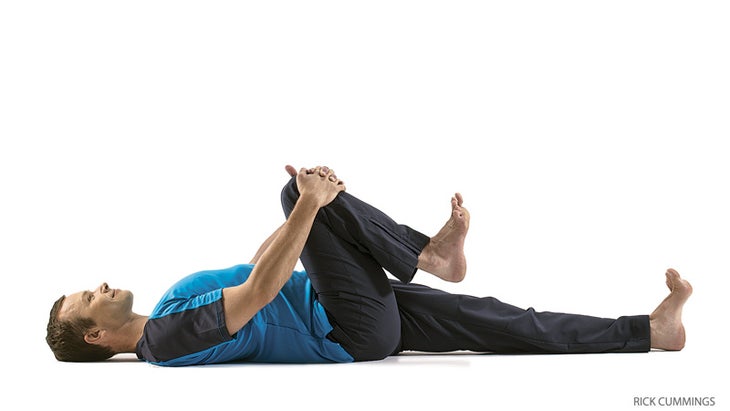
Active Supine Stretch (Ardha Apanasana)
Once you’ve begun to understand the skeletal position and internal sensations that accompany releasing the psoas, you can move on to more actively lengthening the muscle. Starting from constructive rest position and keeping both knees bent, bring your right upper thigh toward your chest. Gently hug your right leg toward your trunk.
Be very careful not to curl your pelvis up off the floor as you move your right leg; the pelvis should remain aligned with the trunk. Sensing into your flexed right hip and softening in the hip socket will help free the right thighbone.
You’re now ready to stretch your left psoas. Very slowly walk the left foot farther away from the hips. As the leg extends, keep your awareness on the front of the left hip socket, releasing any psoas tension you notice there. Once you begin to sense the psoas lengthening, follow the sensation all the way up the muscle to its attachment at the 12th thoracic vertebra, located behind the center of your solar plexus.
To amplify the stretch, push your right leg against your right arm as though you were gently kicking up toward the sky. At the same time, resist the push of the leg with your clasped arms. After a few moments, change sides. Don’t continue this pose if you experience pain or tension in your lower back. Instead, immediately go back to constructive rest position and relax, allowing gravity to release your psoas again.
Try KyraHome 100% Organic Muslin Cotton Throw Blanket

The Ultimate Stretch
All variations of the lunge (sometimes called “runner’s stretch”) and Pigeon Pose are excellent for stretching the psoas, but for many students the best is a modified Pigeon Pose (Eka Pada Rajakapotasana). When you stretch one leg out in front of you and one behind you while keeping your pelvis stable, you isolate the stretch in the psoas and iliacus muscles attached to the back leg.
To come into this pose, start by kneeling on all fours. Swing your right knee forward onto the floor between your hands, releasing and rotating the right femur within the right hip socket, and bring your right buttock toward the floor. At the same time, extend your left leg straight back behind you. Make sure you keep your hips level and squared to the front. If necessary, place a firm bolster or pile of blankets under your right sitting bone to keep your pelvis level and supported. Don’t bring your right buttock to the floor by torquing your right hip farther forward or farther toward the floor than your left.
This posture stretches your left psoas. As you continue to extend back through your left leg, check again that you are keeping your pelvis facing squarely forward. If the pelvis torques, you’ll lose the psoas stretch, and you may also compress or overtwist the lower back. If you’re stretching properly, you shouldn’t feel tension in your lower back. The release and stretch should begin where your psoas crosses your hip at the front of the joint, and you should feel an upward extension through both the front and back of your trunk. The line of your body should form a continuous arc, with no abrupt angles.
Try Yogitoes Manduka Yoga Towel for Mat
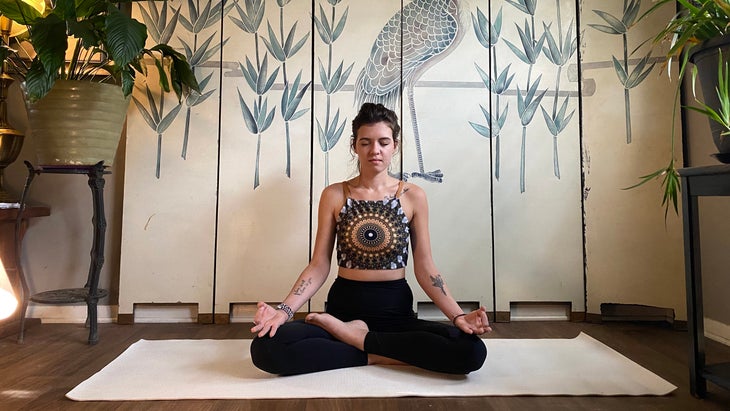
Seated Poses
Now that you’ve discovered how it feels to release and lengthen your psoas, we’ll use a simple cross-legged (Sukhasana) posture to illuminate the proper use of the psoas in seated asanas.
Sit on a firm, folded blanket, with your feet and lower legs off the blanket. Bend your right leg and draw the heel toward your left inner groin. Similarly, bend your left leg and draw the heel toward your right shin. If either of your knees feels strained or if one knee is higher than the other, support that knee by placing a rolled towel or blanket or bolster under the knee or thigh.
Begin to notice where the weight of your torso grounds through your pelvis into the floor. Does most of your weight fall behind your sitting bones, or in front of them? If you sense your weight grounding directly through the bones, refine your questioning. Is your weight more on the front of the bones or the back? Lift your sitting bones off the blanket and pull back on the muscles of the buttocks, so that when you lower down again you shift more firmly onto the front of your sitting bones. See if this action provides a more effortless base of support for your spine, rib cage, and head.
To align your pelvis properly, you may have to raise your sitting bones by placing flat, firmly folded towels or blankets under your buttocks. When you get all your props placed correctly, you’ll be on the front of your sitting bones, with your knees lower than your hip socket. This relationship between knees and hips is critical in all seated postures because it allows your psoas to open at the front of the hip; in turn, this opening allows a release of tension throughout your legs and lower back. As the weight of the body releases down through the bones, it grounds into the earth, and a subtle sensation of support rebounds upward.
When your pelvis is stable and your skeletal structure is free to align properly, sitting feels effortless. You shouldn’t have to use muscular tension to hold yourself up—thrusting your chest forward or pulling your shoulders back to lengthen your trunk. If you feel as though your spine collapses without these actions, if your weight is still placed behind your sitting bones, or if your knees are still higher than your hip sockets, continue to add towels or blankets until you find the sensation of support that accompanies proper alignment.
If you still don’t feel this support even though you’re aligned properly, try shifting your weight slightly forward through your hip sockets until you feel a release at the core of your body. At first, this release may feel a little unsettling. You may even experience a subtle fear of falling. As the psoas lets go, you are shifting from a familiar feeling of controlling your posture with muscles to an unfamiliar feeling of relying on your skeleton for support. Since it’s new, the sensation may feel a bit scary—or you may feel relief as you let go of unnecessary muscular contraction.
Standing Release
Maintaining a released psoas can be challenging in standing postures. Biomechanically, standing on two legs is a very complex task, and many of us have developed habitual—but less than optimal—patterns of muscular contraction to help keep us upright. Fortunately, there’s an excellent exercise that allows you to discover what it feels like to relax your psoas while standing. Take a block or thick book and place it 12 to 16 inches away from a wall. Stand on the block or book with your left foot, supporting and balancing yourself with your right hand on the wall. Let your right leg and foot hang completely released. Gently swing this leg back and forth like a pendulum, taking care not to let the trunk bend or twist as your leg swings. (If your pelvis is torquing, you’re going beyond the released range of motion of your psoas.) See if you can sense the pendulum movement deep within your torso; it should begin at the very top of your psoas at your 12th thoracic vertebra, behind your solar plexus.
After you swing the leg for a few minutes, step down from the block and see if your two legs feel different. You’ve released the psoas attached to the swinging leg, and most likely this leg will feel longer, freer, and more relaxed.
Now reverse your position and swing the other leg. This time focus not only on the leg you’re swinging, but also on the standing leg. Check to make sure you’re not leaning into the standing leg hip. Try to sense your weight passing directly down through your leg and foot and into the block. Even though this leg is now bearing weight, you can release the psoas by bringing your awareness to the front of the hip socket and softening any tension you notice there.
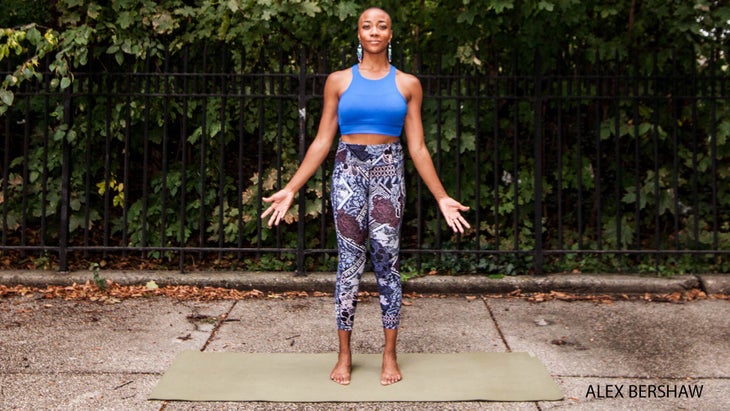
Tadasana (Mountain Pose)
Now let’s investigate Tadasana (Mountain Pose). Stand with your feet directly underneath your hip sockets, and conduct an inquiry of your sensations. Does your pelvis feel like a stable foundation? Is the rim of your pelvis parallel to the floor? You can check by looking in a mirror, or by placing your hands on top of your hips and following the pelvic rim around to the front of your body, checking to see if both hands are level. Do both your legs transfer weight equally? Are you grounding equally through both feet? If your answer to these questions is “Yes,” your psoas should feel released, and you should be able to sense gravity drawing your weight down through your bones. If your bones are aligned, you’ll feel a slight sensation of rebounding from the earth, just as a ball dropped to the floor bounces up again. This rebounding force creates a current of energy that aligns the body, flowing up through your spine and out the top of your skull. If your pelvis doesn’t feel stable and even, try returning to constructive rest position and the supine psoas stretch. After a few minutes of releasing the psoas and stabilizing the pelvis, return to Tadasana and see if you feel more balanced.
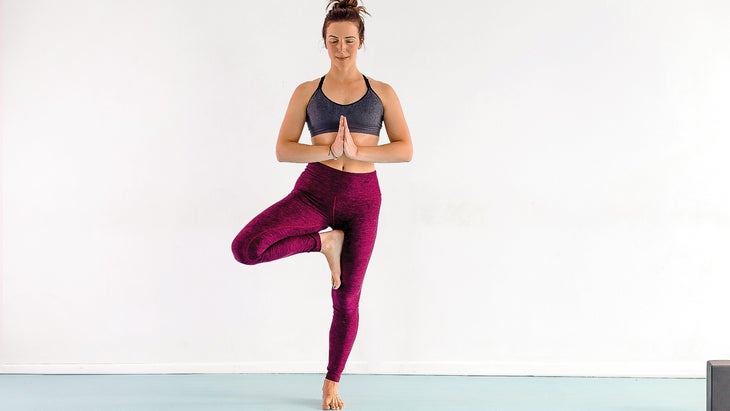
Vrksasana (Tree Pose)
Once your weight feels equal on both feet in Tadasana, focus on sensing your ankles. Shift your weight ever so slightly forward and back over your ankle joints until you find the place where they feel most released. At that point, your psoas is also most free to release and to assume its proper function as a guy wire for the spine. Moving with proper alignment from Tadasana into Tree Pose requires that you continue to sense this connection between your standing leg and your spine, even as you shift all your weight onto one leg and lift the other into the air.
When you’re ready, gradually shift from grounding your weight through both legs to bringing it all onto your right leg. A common mistake in this asana is leaning into the right hip, which can strain the hip ligaments on that side. Instead, balance your weight directly over the bones of your leg, allowing the hip socket to remain released and the right-side psoas to relax.
When you can ground your weight straight down through your right leg, without leaning into your right hip or locking your right knee, you can start to turn and lift your left leg. Begin by softening any tension at the front of the left hip socket, releasing the left psoas. Then rotate the thigh bone in the left hip socket, contracting the external rotator muscles located behind the hip. Once you’ve rotated the femur, lift your left leg, placing the sole of the foot as high as possible on the inner right leg. Again, make sure you didn’t lean into your right hip as you lifted the left leg. If necessary, place your hand on a wall or chair to help you maintain balance.
Watch: Psoas Self-Care: A 5-Minute Wall Exercise to Free Your Upper Core
Psoas and the Arms
If you feel stable and aligned standing in Vrksasana, you can add your arms to the pose. Just as your legs should be able to move independently of your pelvis, your arms should be able to move independently of your shoulders. And, as with your legs, this independent motion can only occur if your psoas is released. To avoid contracting your psoas as you raise your arms, bring your attention to your solar plexus and the back of your rib cage. Melt any rigidity you feel in these areas. Aim to soften and widen equally across the front of your chest and across your back, especially in the area between your shoulder blades. If these regions already feel open, straighten your arms, rotate them outward, and sweep your palms up above your head. If you detect any stiffening in the area of your upper psoas, pause and take your arms a little lower until you can soften the tension you sense in this area. Bringing your arms over your head can challenge the release of the upper psoas where it attaches to the 12th thoracic vertebra, and it can also challenge your stability through your standing leg. To maintain ease at the core of your body, focus on sensing a downward release from the very top of your psoas. Feel your weight dropping down through your bones, even as your arms float up over your head.
If you have difficulty sensing this release, return again to constructive rest position, with your arms at your sides. After a few moments, fold your arms across your rib cage. With this extra weight, the middle of your torso will rest a little more into the floor; you will feel an increased release deep in your trunk as the top portion of your psoas lets go. Once you’ve identified this release, you can again investigate it in Vrksasana.
See also: Why You Should Stop Stretching Your Psoas
Please note that we independently source all of the products that we feature on yogajournal.com. If you buy from the links on our site, we may receive an affiliate commission, which in turn supports our work.
Want to learn more about how to nourish your psoas and develop core awareness? Join Liz in her four-week workshop, Demystifying Your Psoas. Learn more and sign up!
Liked this article? Join Outside+ and get unlimited access to exclusive articles, sequences, meditations and live experiences—as well as thousands of healthy recipes and meal plans from Clean Eating and Vegetarian Times, plus can’t-miss content from more than 35 other brand like Women’s Running, Backpacker, and Better Nutrition.